Virtual meetings have become necessary to our daily routines in the contemporary landscape of remote work and online learning. Recording Google Meet sessions is an essential practice that can significantly enhance productivity and ensure the retention of important information discussed during meetings. This guide provides a structured approach to recording Google Meet sessions, allowing you to efficiently capture and share valuable content with colleagues, students, or participants who cannot attend.
Why Record Google Meet Sessions?
Recording meetings offers numerous advantages that contribute to improved communication and collaboration. It allows important discussions, decisions, and presentations to be shared during the session. This feature is particularly beneficial for students seeking to review lectures or professionals requiring a reference for project updates.
Additionally, recorded sessions can be disseminated to team members unable to attend, ensuring that all stakeholders remain informed and engaged. Recordings promote transparency and encourage open dialogue within teams or educational environments by providing access to past discussions.
Prerequisites for Recording

Before proceeding to record, it is imperative to ensure that you meet the necessary prerequisites. First, confirm that you possess the appropriate permissions to record the meeting. Typically, only the host or co-host of the meeting is authorised to initiate a recording.
It is also essential to inform all participants that the session will be recorded, as this fosters transparency and builds trust among attendees. Furthermore, verify your Google Meet settings to confirm that the recording option is enabled for your account, as specific editions of Google Workspace may impose limitations.
How to Record a Google Meet Session
a) How to Record a Google Meet on Windows And Mac
There are different ways to record a Google Meet meeting on a Windows or Mac computer. You can use the Google Meet app or a built-in or third-party screen recording tool. In this guide, the Google Business Standard Workspace account is used to record a Google Meet call.
Here’s how to record Google Meet videos on a computer:
1. Start a Google Meet Meeting.
Go to Google Meet on your computer’s web browser and select Start a new meeting.

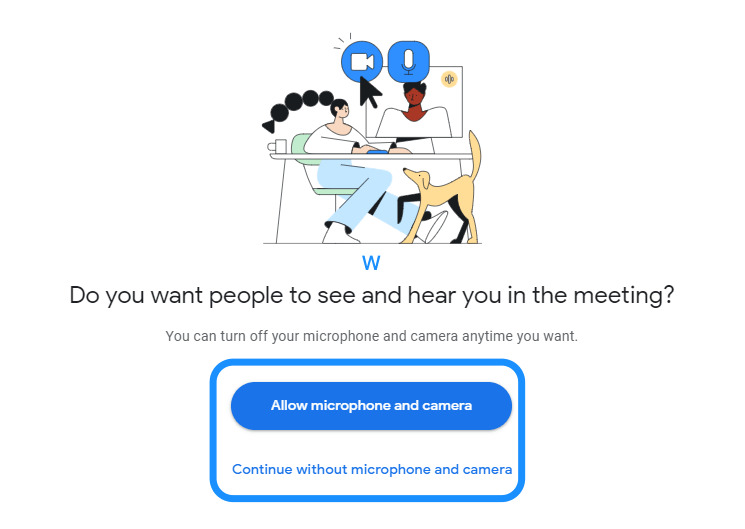
2. Enable Your Microphone and Camera.
Select Allow microphone and camera to enable audio and video or select Continue without microphone and camera to join without enabling audio/video.
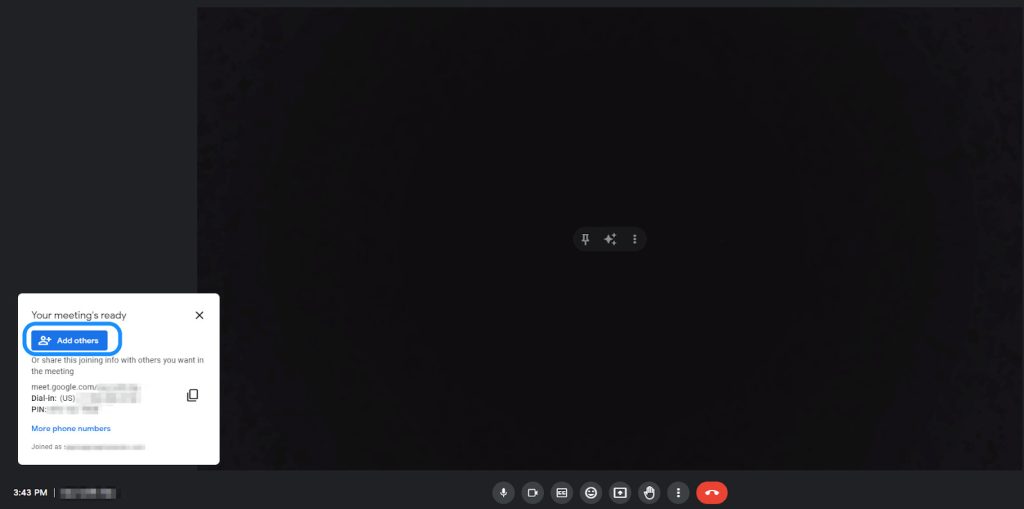
3. Invite other participants to the meeting.
Select Add others to invite other participants to the meeting or copy and share the joining information.
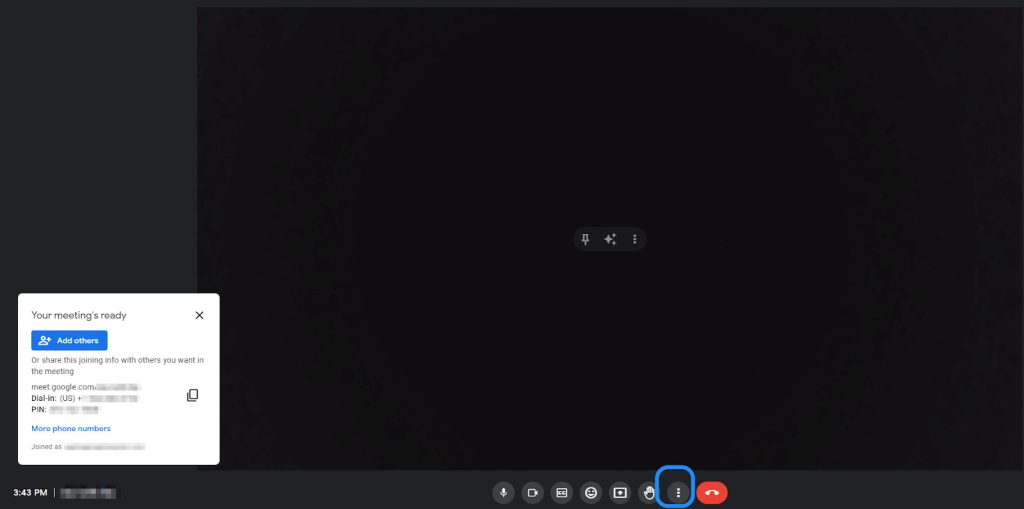
4. Record the meeting
Select the blue Activities icon (if visible) or More (ellipsis) to access additional meeting controls.
Depending on your Workspace settings, you’ll see the Record Meeting or Manage recording option.
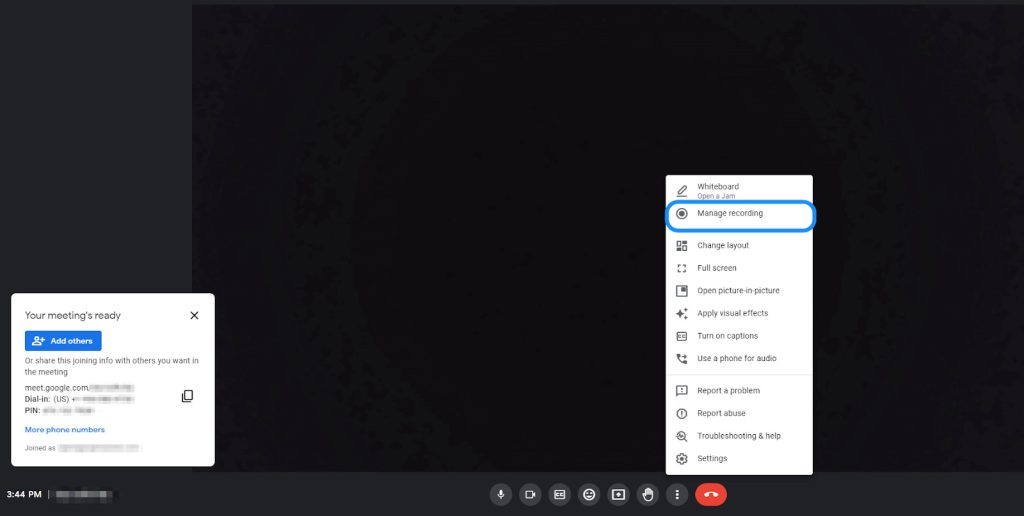
If you see Manage recording, select it, then select the blue Activities icon at the bottom right corner of your screen.
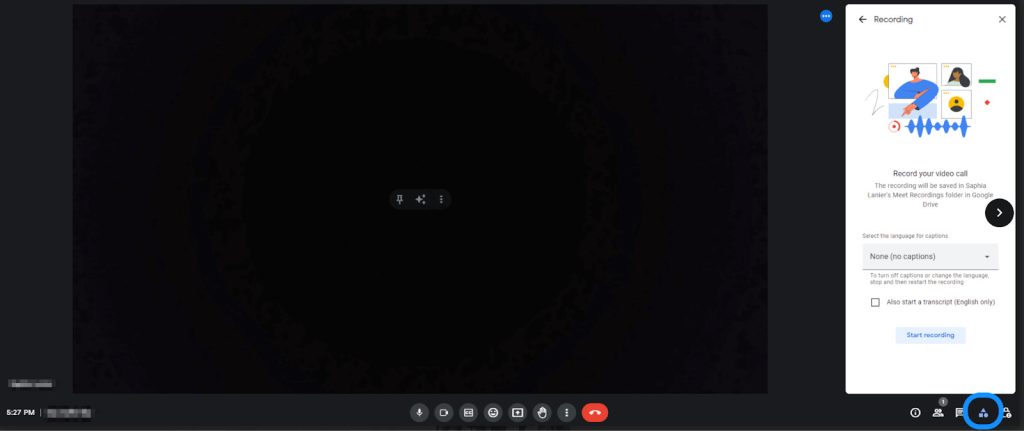
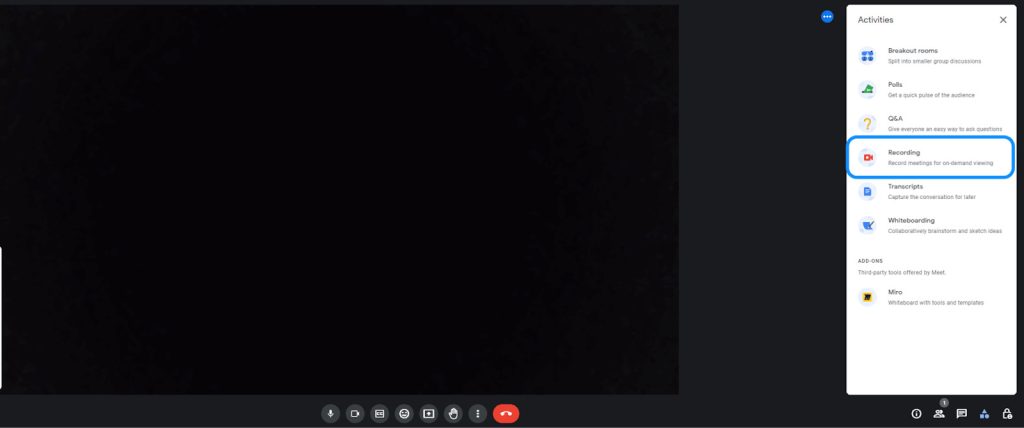
Select Recording.
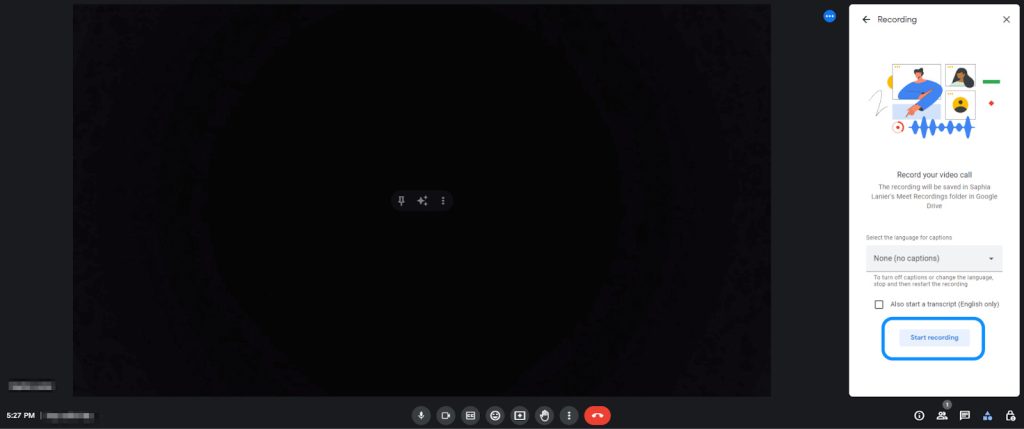
Click Start Recording to record the meeting.
A pop-up will appear, reminding you to obtain consent from all participants before recording. If you’ve already done that, select Start to record.
Participants outside your organisation, mobile app users, and people who dial in using a phone will be notified when you start or stop the recording.
When the recording starts, a red recording icon will appear in the upper left corner of your screen.
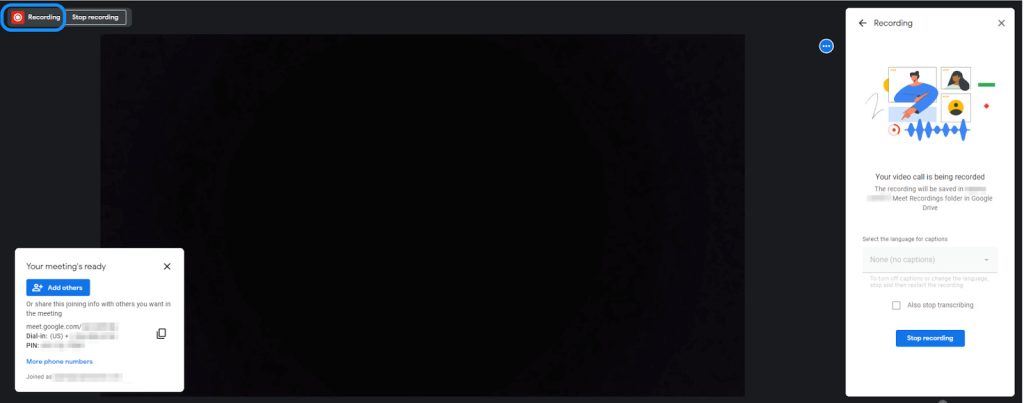
5. Stop the Recording
When you’re done with the meeting, select the Stop Recording button at your screen’s top left corner or bottom right.
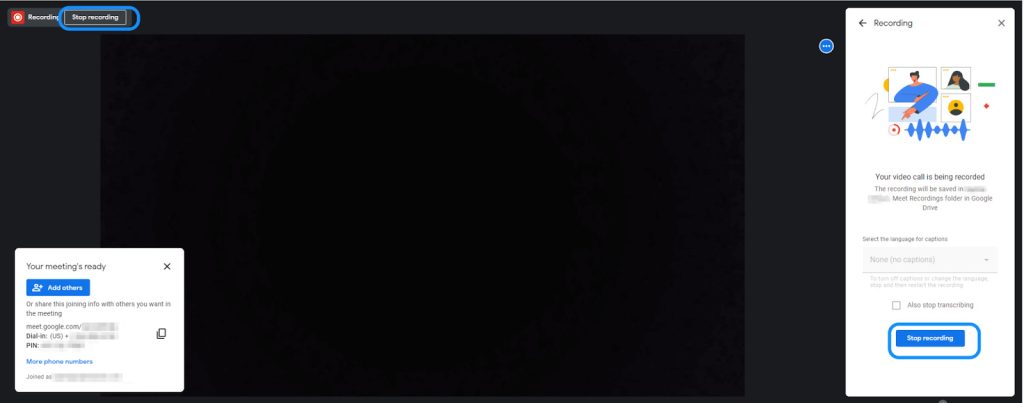
The recording will end immediately. You’ll be notified that your recording will be saved in the meeting organiser’s Meet Recordings folder in My Drive. This will be followed by an email with the recording link to access the recording files.
Google Meet recording files contain:
- The active speaker
- Files presented during the meeting
- Meeting captions
- Chat conversation log (.SBV file)
You can replay Meet chat recordings on a media player like VLC Media Player (Windows) and QuickTime Player (Mac) or via the YouTube player in Google Drive.
b) How to Record a Google Meet on iPhone and Android
You can’t record a Google Meet on an iOS or Android device. But you can use your phone’s native screen recording tool to record the meeting—even if you don’t meet Google’s recording requirements. This is how you can do it.
- Join a Google Meet
Download the Google Meet app on your iPhone or Android device, then tap it to launch it. Click the link provided by the meeting host or open the Google Meet app and enter the meeting code.
- Turn on your phone’s screen recording.
Swipe down from the top of your phone’s screen to access the Quick Menu settings on your Android phone. On an iPhone, swipe to access the Control Centre and tap the grey Screen Recording button.
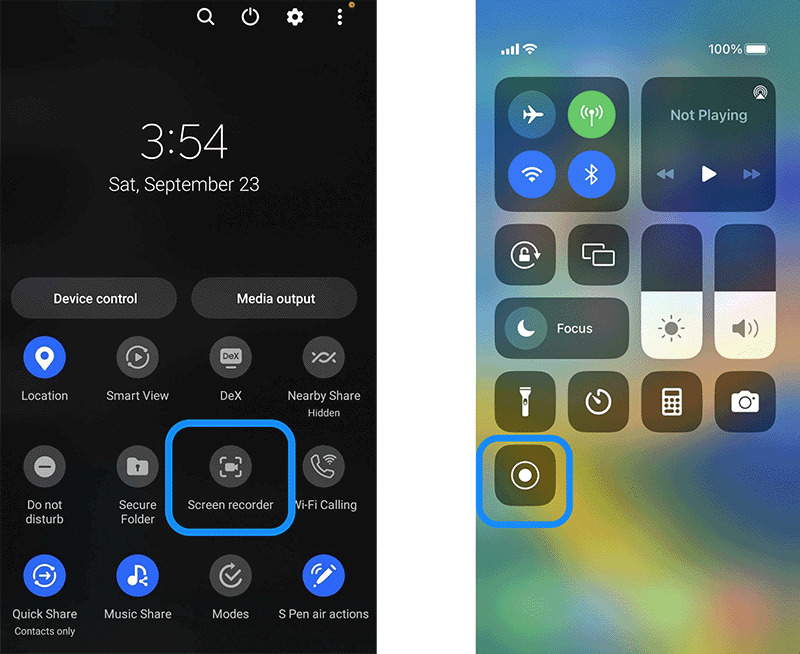
Selecting the screen recording option on Android (left) and iPhone (right)
- Click the microphone icon to screen record with audio.
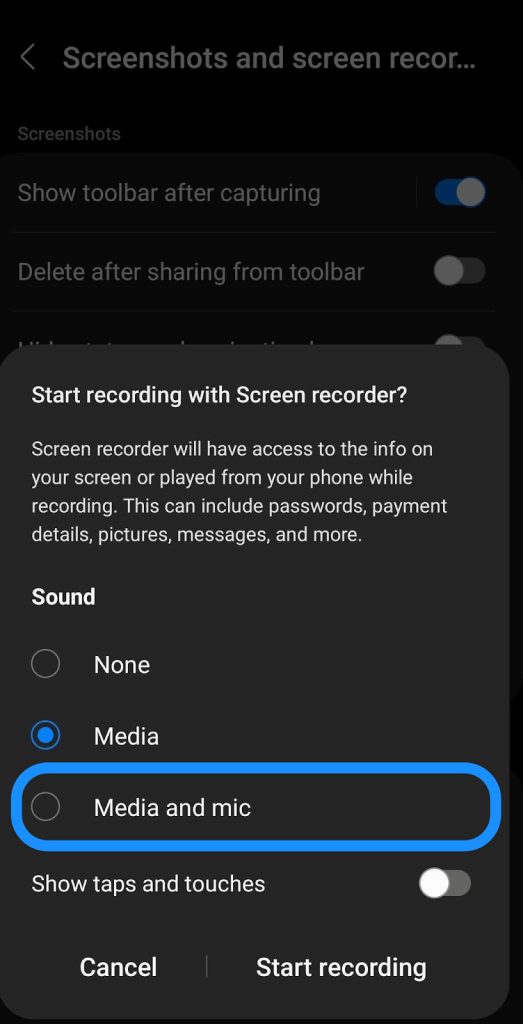
Select Media and mic on your Android phone to screen record with audio.
- Start recording
Tap Start recording on your Android phone.
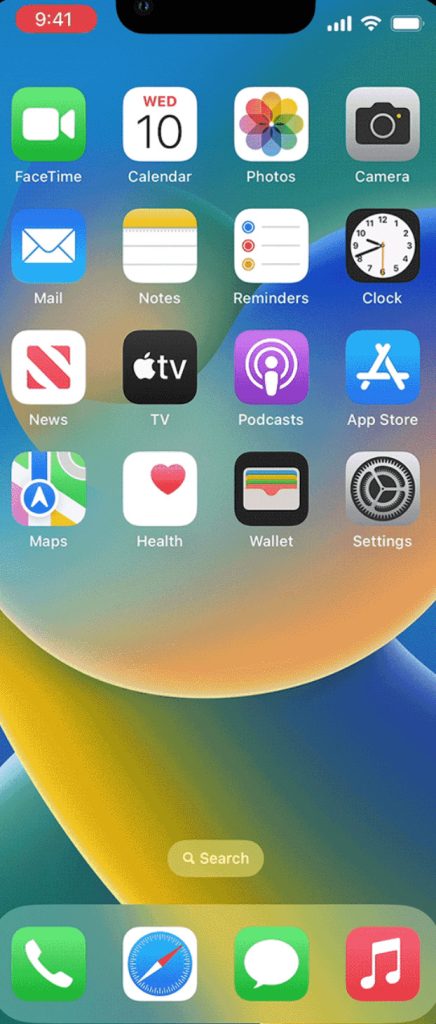
On your iPhone, exit the Control Center to start recording your screen. When recording, a red status bar will appear at the top of your screen.
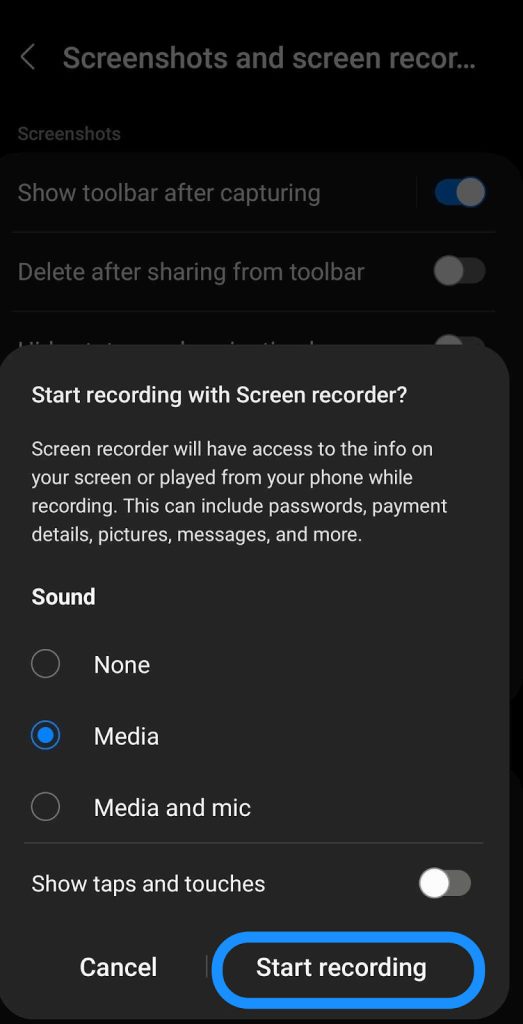
Starting a screen recording on Android
5. Stop the recording
When the meeting ends, tap Stop on your Android phone to stop recording.
On an iPhone, swipe to open the Control Center and tap the red Record button. Or tap the red status bar, then tap Stop to stop recording.
You can access your video recordings from your Android phone gallery or Photos app on your iPhone, then edit or share with others.
Managing Recorded Files
After recording your session, it is essential to understand how to manage the recorded files effectively. All recorded sessions are stored in your Google Drive under the “Meet Recordings” folder, allowing convenient access whenever necessary.
You can easily click the share button to share these recordings with your colleagues or classmates. This button lets you send links directly or grant specific individuals access to the files. Recordings can also be downloaded to your computer for personal or archival purposes.
Tips for Effective Recording
To optimise the effectiveness of your recordings, consider implementing the following best practices. Firstly, ensure you conduct your meeting in a quiet environment to minimise background noise, as this can significantly impact the quality of the recording.
Additionally, confirm that your camera and microphone function properly to guarantee clear audio and visual quality. If you present during the meeting, share your screen efficiently to ensure all participants can follow along seamlessly.
Finally, before initiating the recording, outline the meeting agenda to help participants stay focused throughout the session.
Troubleshooting Common Issues
While the recording process is generally straightforward, you may encounter occasional issues. If the recording option appears unavailable, check your internet connection, as a weak signal can hinder the functionality. Ensuring sufficient storage space in your Google Drive is also advisable, as recordings can occupy considerable storage capacity.
If problems continue, consider restarting your device or browser, which can resolve many technical complications. If you use a Google Workspace account, consult your administrator to ensure recording features are enabled.
Conclusion
Recording Google Meet sessions is a valuable tool that significantly enhances productivity and collaboration in remote environments. By enabling the preservation of essential discussions and facilitating information sharing, recording ensures that crucial content is readily available for future reference. With the guidance provided in this article, you will be well-equipped to record your Google Meet sessions effectively. The next time you participate in a meeting, consider utilising the recording feature—you will find it an indispensable asset.
1. Can I Record Google Meet Sessions On A Free Gmail Account?
No, recording is only available for specific Google Workspace editions. Free Gmail accounts do not have access to this feature.
2. How Do I Enable Recording On Google Meet As An Admin?
As a Workspace admin, go to the Google Admin console, navigate to Google Meet settings, and enable the recording feature under the “Meet video settings.”
3. Where Are Google Meet Recordings Saved?
Google Meet recordings are saved in the host’s Google Drive under a folder labelled “Meet Recordings” and can be shared with participants if needed.
4. Can Participants Record Google Meet Sessions?
Only the meeting host or co-host can record the session unless the admin allows participants to record through specific settings.


