Schema markup, also known as structured data, plays a crucial role in enhancing your website’s visibility on search engines by providing detailed information about your content. In this guide, we will walk through the process of adding schema markup to your WordPress site using code insertion within Elementor.

Why Use Schema Markup?
Schema markup is a form of microdata that you can add to your website to help search engines understand the content better.
Implementing schema markup on your website offers several significant advantages. First, schema markup can result in rich snippets appearing in search results. These rich snippets include additional information such as ratings, prices, and other details, which provide users with a more informative preview of your content. This can lead to higher click-through rates (CTR) because rich snippets make your listings more visually appealing and compelling to users.
Moreover, schema markup improves search engine understanding of your content, enabling search engines to interpret and index your pages more accurately. This enhances your website’s visibility and relevance in search results, ultimately giving you a competitive advantage by helping your listings stand out prominently among competitors.
Adding Schema Markup with Elementor
Elementor is a popular page builder for WordPress that allows you to create and customise websites visually. Follow these steps to add schema markup with Elementor:
Step 1: Checking and Choosing Your Schema Markup Type
To determine if a specific page or website already has schema markup, install the Schema Builder for Structured Data Chrome extension. Once installed, navigate to the webpage and activate the extension. A green radio button indicates detected schema markup.

Next, select the appropriate schema markup type for your content. Some of the common and important schema markups that your website should include are:
- Local Business: Ideal for businesses with physical locations.
- Website: Provides information about your website.
- Logo (Organisation): Specifies your organisation’s logo.
- Breadcrumb: Displays hierarchical links that help users and search engines understand page relationships.
- Articles: Used for blog posts and news articles.
Step 2: Generate the JSON-LD Schema Markup Code
Use tools like Merkle Schema Markup Generator or Schema Builder Chrome extension mentioned above to generate the appropriate JSON-LD schema markup code.
Using Merkle Schema Markup Generator
- Visit the Merkle Schema Markup Generator website.
- Choose the type of schema markup you want to create from the available options, such as Local Business, Website, Logo (Organisation), Articles, etc.
- Enter the specific details required for the selected schema type. For example:
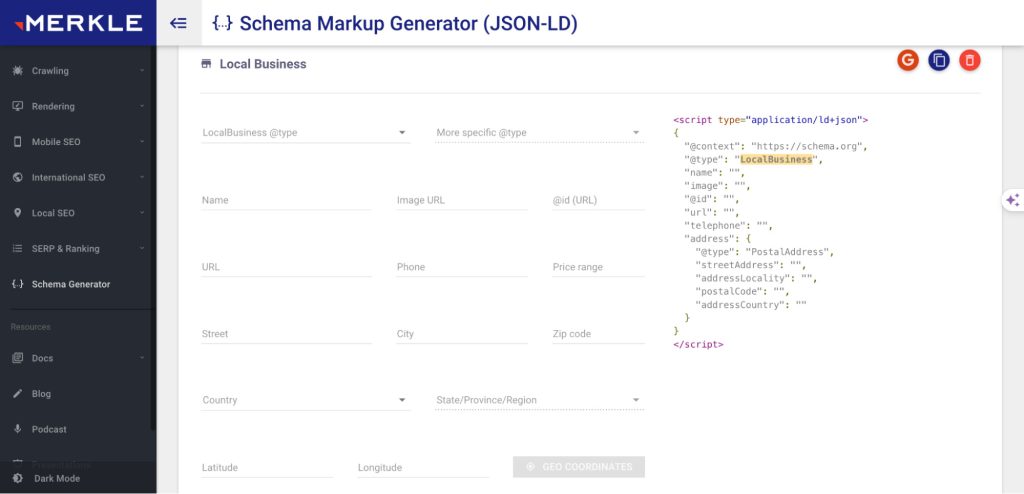
For Local Business: Enter business name, address, phone number, opening hours, etc.
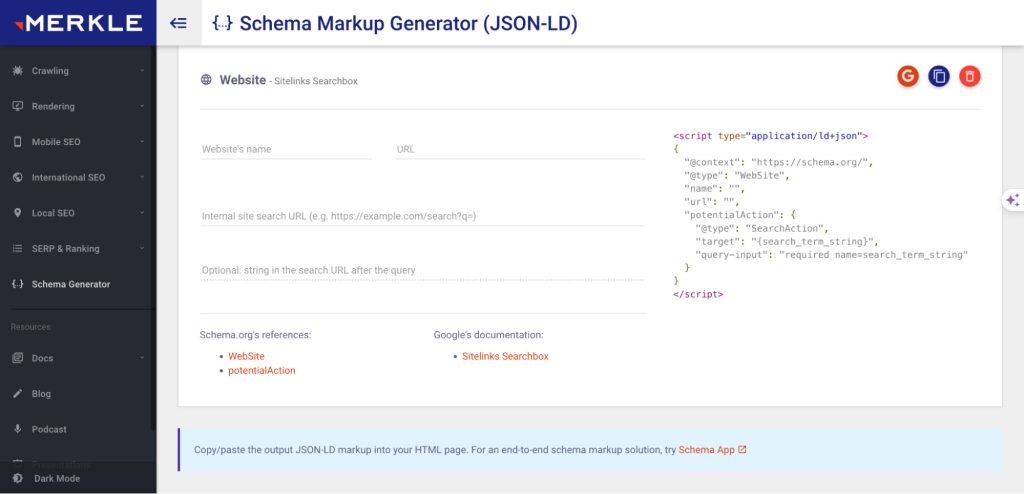
For Website: Enter website name, URL, description, potential action (optional), etc.
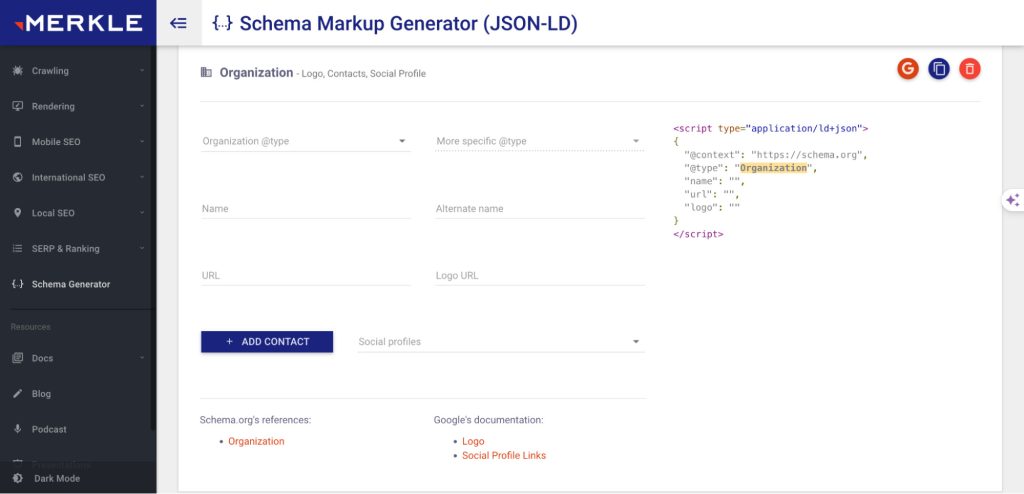
For Logo (Organisation): Provide the URL of your organisation’s logo image file.
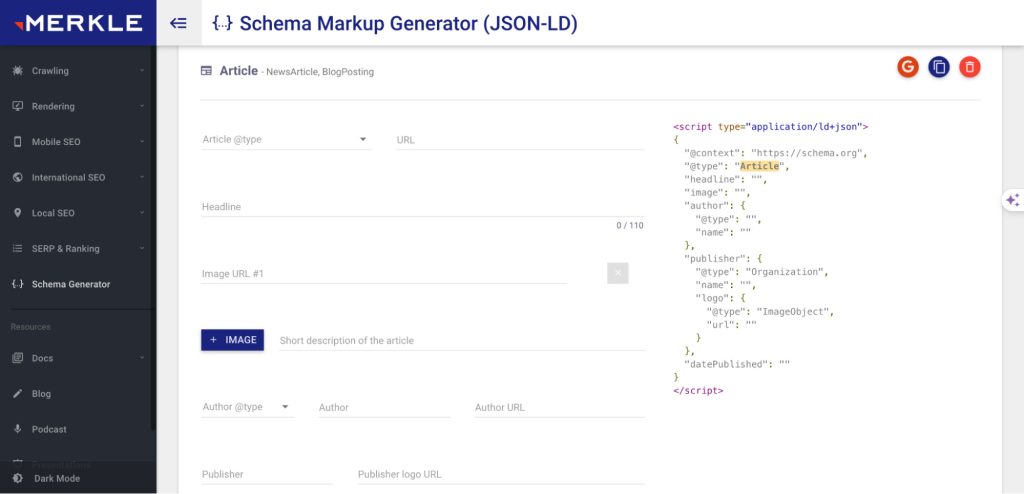
For Articles: Enter article title, date published, author, image URL, etc.
- Once the schema markup is generated, copy the provided JSON-LD code snippet (blue icon in the middle).

- Click the first red button with a ‘G’ to test the code. You will be navigated to the ‘Rich Results Test’ page. Click ‘Test Code’.
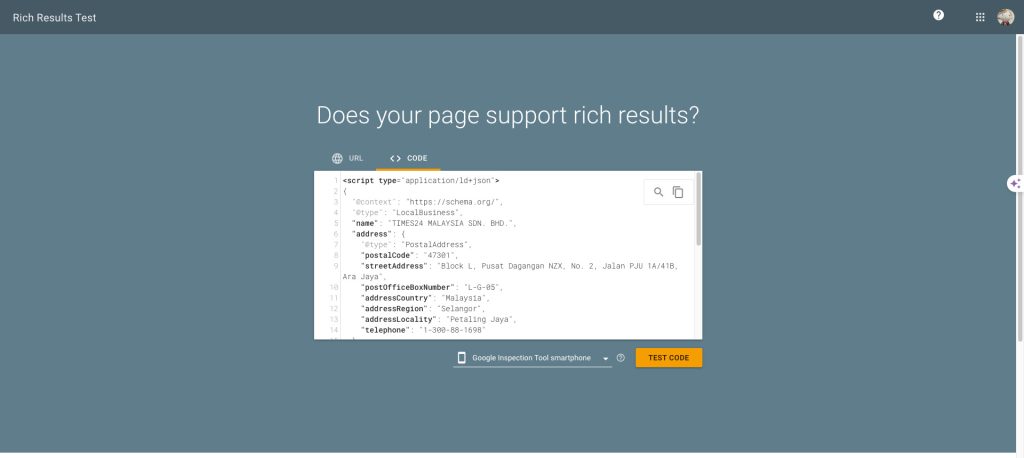
- If a valid item is detected, it indicates that your schema is correct. Copy the code.
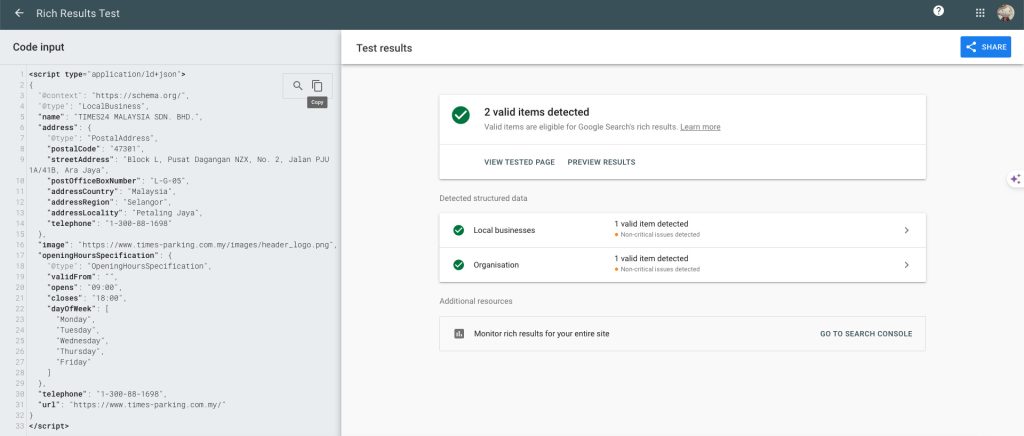
Using Schema Builder Chrome Extension from schema.org
- Click on the Schema Builder Chrome extension.
- Select the schema type you want to add to the page. For example, the local business schema.

- You can choose either ‘enter static value’ (the pencil icon) or ‘capture value from screen’ (desktop icon with cursor).
- Please ensure that most or all fields are completed.
- Once you have constructed the schema markup, click ‘View Markup’.

- Click ‘Test on Google’ button in green. You will be directed to the ‘Rich Results Test’ page. Click the ‘Test Code’ button.
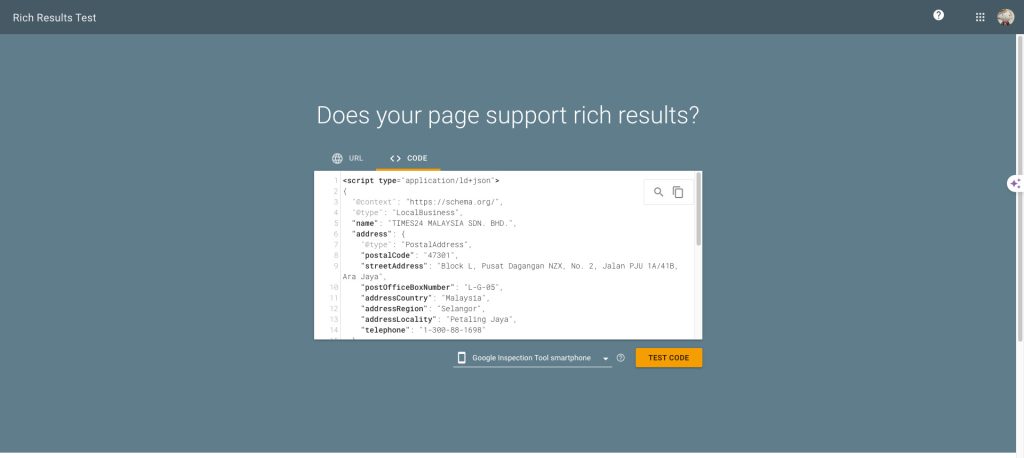
- Once the result shows a valid item detected, click ‘Copy’ to copy the code.
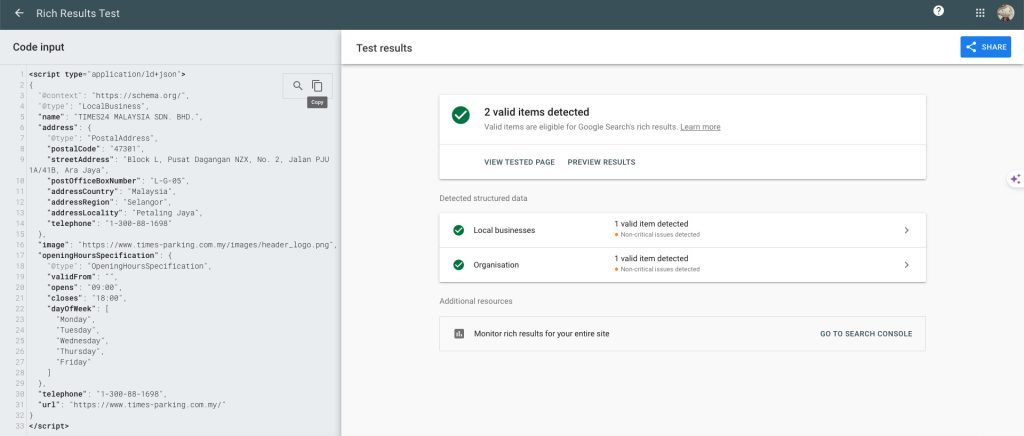
Step 3: Create or Edit Your Page with Elementor
Visit the page where you want to insert schema markup. Click ‘Edit with Elementor’.
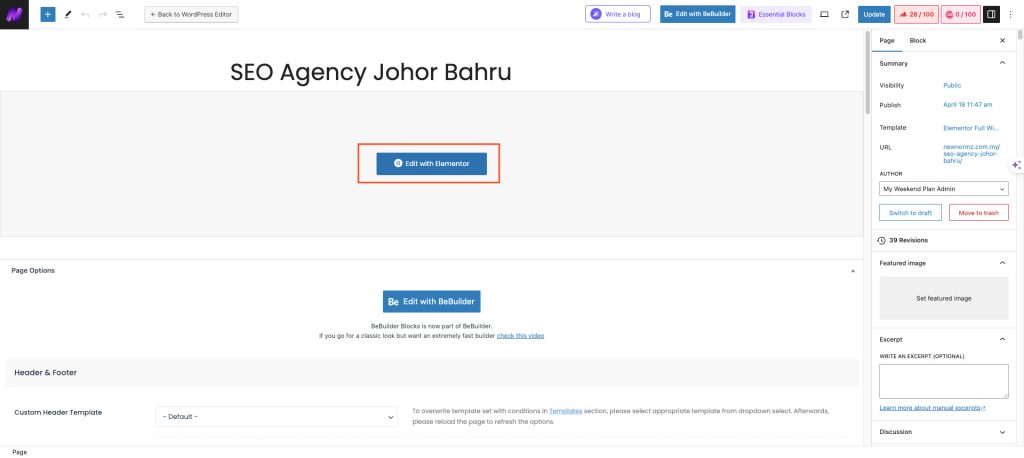
Step 4: Insert Schema Markup Code
In the search box, type ‘HTML’. Click on it and insert the schema code. Then, click ‘Update’.
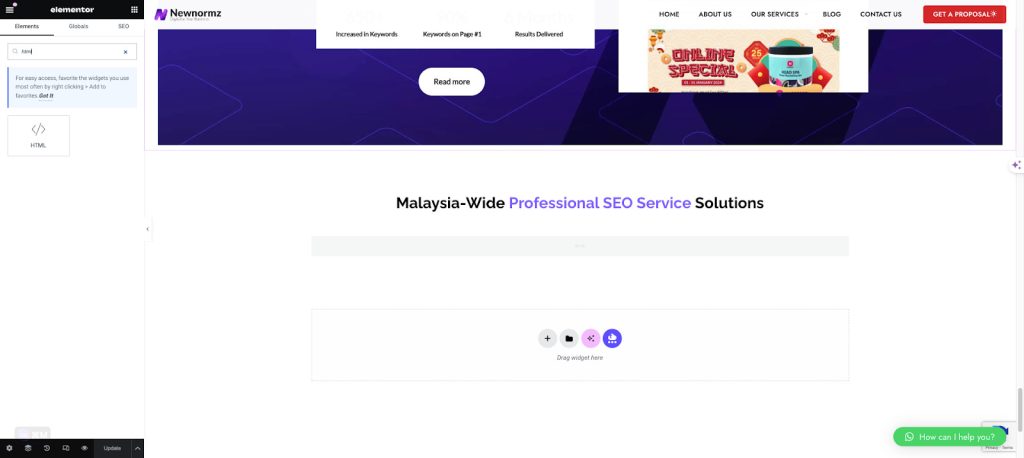
Step 5: Check the schema
Launch the Schema Builder Chrome extension and ensure that a green radio button is present to confirm successful schema implementation.

Conclusion
Integrating schema markup into your WordPress site via HTML code insertion with Elementor can significantly enhance your site’s visibility and click-through rates in search results. By following this 5-step guide and utilising Elementor’s capabilities alongside schema markup generators, you can bolster your SEO efforts and provide users with more detailed search listings.
Implement schema markup today to elevate your website’s search engine optimisation. Contact our technical SEO consultants in Malaysia for assistance.
Bryan Tan is an SEO Specialist and CEO at Newnormz, helping hundreds of businesses achieve first-page rankings on Google. With a passion for driving organic growth, Bryan blends innovative strategies with hands-on experience to optimize websites for maximum visibility. Always at the forefront of the latest SEO insights and trends, he consistently adapts to the evolving digital landscape.


